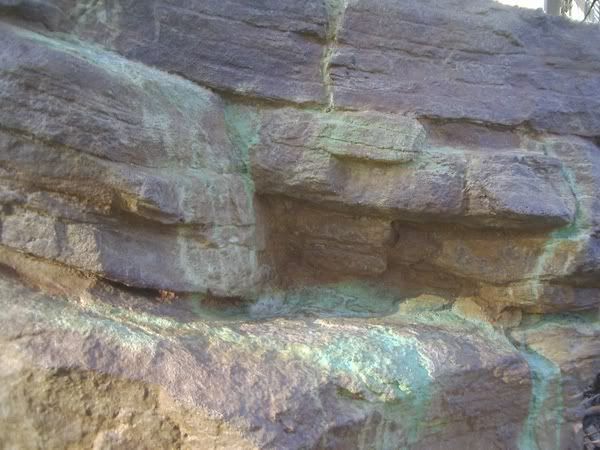
Fake rock for geckos

Archie

New member
This is the begining of the new home for my pair of Chondrodactylus angulifer angulifer. Thought I would go for a naturalistic Vivarium seeing as though my groung geckos are agro (may have been wild caught)

I thought the fake rock background would look best. Used Polystyrene to form the basis of the "rock", Not the most ideal medium but it was all I had available at the time. Will later post pictures of the first layer of concrete.
 

Attachments

  • P.A.R.T.Y!! 061.jpg
    P.A.R.T.Y!! 061.jpg
    93.1 KB · Views: 241
  • tank 023.jpg
    tank 023.jpg
    55.6 KB · Views: 228
  • tank 031.jpg
    tank 031.jpg
    51 KB · Views: 223
  • tank 039.jpg
    tank 039.jpg
    47.9 KB · Views: 215
  • tank 042.jpg
    tank 042.jpg
    33.5 KB · Views: 216

Archie

New member
Here is the first layer of concrete, it is terracotta tile grouting, didn't like the colour or the thickness but it forms the basis for the next layer.

The grouting didnt have much body to it so i ended up slopping it all over the place like thick paint just used my hands(makes a serious mess). The next layer was done with normal grey tile grouting will post pics tomorrow.
 

Attachments

  • tank 051.jpg
    tank 051.jpg
    55.1 KB · Views: 71
  • tank 054.jpg
    tank 054.jpg
    76.1 KB · Views: 91
  • tank 055.jpg
    tank 055.jpg
    77.6 KB · Views: 86
  • tank 053.jpg
    tank 053.jpg
    64.5 KB · Views: 84
  • tank 058.jpg
    tank 058.jpg
    70.6 KB · Views: 89

trojangecko

New member
Hey, that's a really neat idea. What size is that tank? Are you just using hot glue or are you using something else?

I may have to pilfer that idea in the near future...
 

Archie

New member
@Trojangecko- The tank is about 300Litres not sure of what that is in gallons. The tank is about 1250mmx500mmx550mm.
Started useing hotglue doesn't work to well with Polystyrene just melts it, ended up useing a glue called "No More Nails" because it doesn't melt the Polystyrene.
 

Archie

New member
Here is the next step. Sorry only took photos after I had finished the second layer of grey tile grouting (got carried away), these pictures where taking whilst it was still drying, ended up going white once the grouting was dry.

It took two layers to get an effect that I was satisfied with, although there is lots of margin for improvement. I have started to paint the "rocks" Ive got non toxic Acrylic will post pics when complete.
 

Attachments

  • tank 001.jpg
    tank 001.jpg
    53.7 KB · Views: 54
  • tank 005.jpg
    tank 005.jpg
    57.9 KB · Views: 70
  • tank 006.jpg
    tank 006.jpg
    60.4 KB · Views: 72
  • tank 002.jpg
    tank 002.jpg
    47.9 KB · Views: 70
  • tank 004.jpg
    tank 004.jpg
    56.2 KB · Views: 93

trojangecko

New member
That would be around 150 gal, I think... I'm not good at unit conversions! :)

What type of gecko are you going to put in there? I really like the effect. You've inspired me! I think I'm going to try for a canyon/sandstone layer of sediment feel in my tank, eventually. Great stuff!
 

Archie

New member
[What type of gecko are you going to put in there?

Got a pair of Giant ground geckos (Chondorolactus angulifer angulifer dont know the spelling) The tank will be a bit large and they probably wont make mush use of the background but I plan to add a few more females once the tank is finished.
 

Archie

New member
Here is the nearly finished product. Painted the rocks with Acrylic paint then used sand paper to finish it off to give it a more natural look. This is as far as I have gotten so far, Awaiting my canopy and stand so that I can add sand plants and then later the new inhabitants.

Excuse the pic quality.
 

Attachments

  • rocks 001.jpg
    rocks 001.jpg
    60.4 KB · Views: 67
  • rocks 002.jpg
    rocks 002.jpg
    58 KB · Views: 75
  • rocks 003.jpg
    rocks 003.jpg
    55.8 KB · Views: 79
  • rocks 004.jpg
    rocks 004.jpg
    56.6 KB · Views: 80
  • rocks 005.jpg
    rocks 005.jpg
    52.5 KB · Views: 83

HerpInvert

New member
looks cool. sort of like this:

IMGP9007.jpg
 
Last edited:

Archie

New member
Ok I got round to setting up the decor inside my tank. Here are the results so far. Not finished yet as I will still add a few more plants to the back wall. The Canopy arrives at the end of the week and the stand should be soon too.

Once the canopy is on the new inhabitants will go in as I cant keep them in their temp enclosure any longer.

I built a tunnel under the enclosure along the front of the glass for them to hide in and still be viewed, as you can see in one of the pics
 

Attachments

  • planted 002.jpg
    planted 002.jpg
    74 KB · Views: 59
  • planted 006.jpg
    planted 006.jpg
    65.4 KB · Views: 61
  • planted 007.jpg
    planted 007.jpg
    60 KB · Views: 59
  • planted 009.jpg
    planted 009.jpg
    55.8 KB · Views: 56
  • tank 008.jpg
    tank 008.jpg
    75.4 KB · Views: 60
  • planted 011.jpg
    planted 011.jpg
    85.1 KB · Views: 45
  • planted 012.jpg
    planted 012.jpg
    72.3 KB · Views: 51
  • planted 010.jpg
    planted 010.jpg
    67.1 KB · Views: 42
Top