my kingdom for a match

sschind

New member
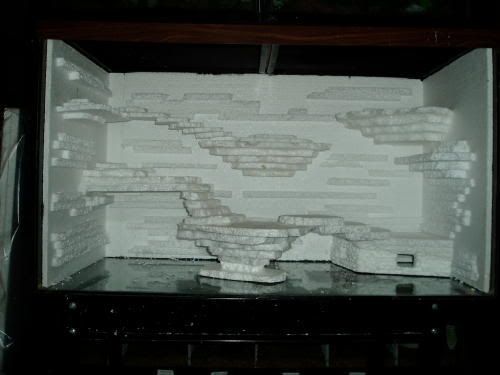
So I stopped by Menards this morning to get a new torch to soften up the lines of my styro background, and some tile grout to finish it off. I get back to my shop and I can't find a lighter or a match anywhere and I can't leave to go get one. Oh well, here are a few pictures of it in progress. Its a 50 gallon and it will hold a pair of Western collared lizards. I was looking for some geckos to go in here that would utilize the vertical space but the baby collared lizards came up so I grabbed them instead.

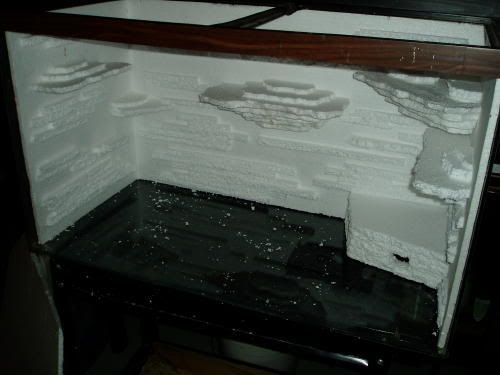
I made the a couple of the basking platforms and the two arches removable as you can see in the third picture so to make it easier to apply the grout and finish. The hide on the bottom right will also be removable but I left it in for the picture. I've done several of these as flat backgrounds so I could flip them any which way with ease but this is my first attempt at an in situ background so I am anticipating a few more problems getting it all coated evenly. I removed the front glass partly to facilitate construction and finishing and partly to replace it with two flip down glass doors when the inside is done.

hopefully the pictures turn out.


desertbackground1.jpg


desertbackground2.jpg


desertbackground3.jpg
 

sschind

New member
A customer saved the day and lent me his lighter to get the torch going.

Here is a picture after the first coat of grout. It's messy as all get out but kind of fun at the same time. The best part is it doesn't matter how much you slop. Its about the only thing I can do with a paint brush and not get into trouble. I do have to go scrub my floor now though. Its still wet in the picture so there is a bit of reflection. It should dry to a nice dull sandy finish. The first coat is a bit watery so a lot of the styro still shows through. The 2nd and 3rd coats will take care of that. It took about 15 minutes to do the first coat.

I'll post more as I progress.

desertbackground4.jpg
 

sschind

New member
Thanks, I just got the second coat on today. I left it on its back and just let the slop settle so hopefully its not to thick. If it works I'll do the third coat on one side and the fourth on the other. It should give nice coverage.

Most of it expanded polystyrene that I got at Menards. It comes in 16X48 inch pieces. But in the pasy O have used any kind of polystyrene packing styro. I look at all the packing that appliances and electronics come in and a lot of times I can use that. I just got a few fragile items in the mail and they came packed in styro in a variety of shapes and it gave me a new idea. I'm going to try a few test pieces and if they work out I'll post the pictures.
 

Regan

New member
Nice, to me it's Nature meets Art Deco! I'm sure the plants and stuff will make a difference, but it looks cool all naked like a theatrical set.

I've gotta get over my fear of grout... I still have this image of me grouting my hand to the floor by accident or something.
 

xtacsoulja

New member
wow thats gonna look awesome,love the way u layered the ledeges, i just made my first foam/crete background 2 weeks ago, but it didn't quite turn out like i had hoped, next time!!
 

sschind

New member
Thanks, My sister says I have ADD. I just can't seem to finish things I get started on. My apartment and shop are littered with things that are "going to be so cool when I get them done" type things. I think since the last picture I got one more coat on it.

Maybe this week:)
 

leaping lizards

New member
Wow ...That looks awesome!

What are the steps to building something like that?

I got the Styrofoam part but is it just grout you use to seal it?
 

jpstodwftexas

New member
Looking Fantastic reminds me of the Emeral Swift Display at the Dallas World Aquarium

Here are a couple of Inspiration shots to help you envision the way it could look finished and planted


Top