BlackSwampReptiles
New member
We just finished building a new incubator for the 2017 breeding season. I wish I had taken more pictures during the build, but figure that some may find a summary of the construction to be helpful.
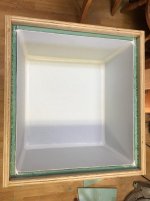
The incubator box is made from 3/4 inch plywood, lined with 1/2" foam. The interior was then lined with plastic paneling (sold for backsplash applications) and caulked at the joints to make it water tight.

The door of the incubator has a double-paned glass viewing window to allow easy viewing of the eggs without needing to open the incubator. Heat is supplied by a strip of 11 inch flexwatt heat tape which is controlled by a herpstat intro + thermostat. To avoid hotspots, a small PC fan is mounted to the top of the incubator, where it constantly blows air down and over the heat tape. It was designed to hold 4 SIM incubation containers.

I am happy to answer any specific questions!
The incubator box is made from 3/4 inch plywood, lined with 1/2" foam. The interior was then lined with plastic paneling (sold for backsplash applications) and caulked at the joints to make it water tight.

The door of the incubator has a double-paned glass viewing window to allow easy viewing of the eggs without needing to open the incubator. Heat is supplied by a strip of 11 inch flexwatt heat tape which is controlled by a herpstat intro + thermostat. To avoid hotspots, a small PC fan is mounted to the top of the incubator, where it constantly blows air down and over the heat tape. It was designed to hold 4 SIM incubation containers.

I am happy to answer any specific questions!

